MoonLight Installer
Install MoonModules/MoonLight on an ESP32 microcontroller.
You need a Web Serial–compatible browser such as Chrome or Edge. Safari is not supported.
For devices that already have MoonLight installed, go to Update.
▶️ Watch the install tutorial (v0.6.0), or follow the instructions below.
Prepare an ESP32 device
Recommended plug-and-play device to get started, up to 2048 LEDs @ 30FPS (two outputs) or 10K+ LEDs over the network (Art-Net): QuinLED-Dig-Next-2

Recommended low-cost DIY board up to 10K LEDs: ESP32-S3 n16r8

Recommended state-of-the-art DIY board, up to 16-98K LEDs: ESP32-P4-Nano

See Hardware for other options.
Connect the device to your PC using a USB cable that supports data transfer.
Flash the firmware
Select your ESP32 device from the table below, press the corresponding Connect button, and follow the steps. Nightly builds are experimental: See the Test Channel on the MoonLight Discord server for new functionality to test.
When installing MoonLight for the first time, enable the Erase checkbox.
After a successful install, go to Logs & Console, press Reset Device, and close the installer.
Bootloader mode
If installation does not work, some boards must be placed into bootloader mode the first time:
press and hold the Boot button on the ESP32, press the Reset button, then release the Boot button.
| Name | Image* | Release v0.9.0 | Nightly build | Shop & Board presets |
|---|---|---|---|---|
| esp32-d0 |  |
Dig-2-Go, Dig-Uno, Dig-Quad: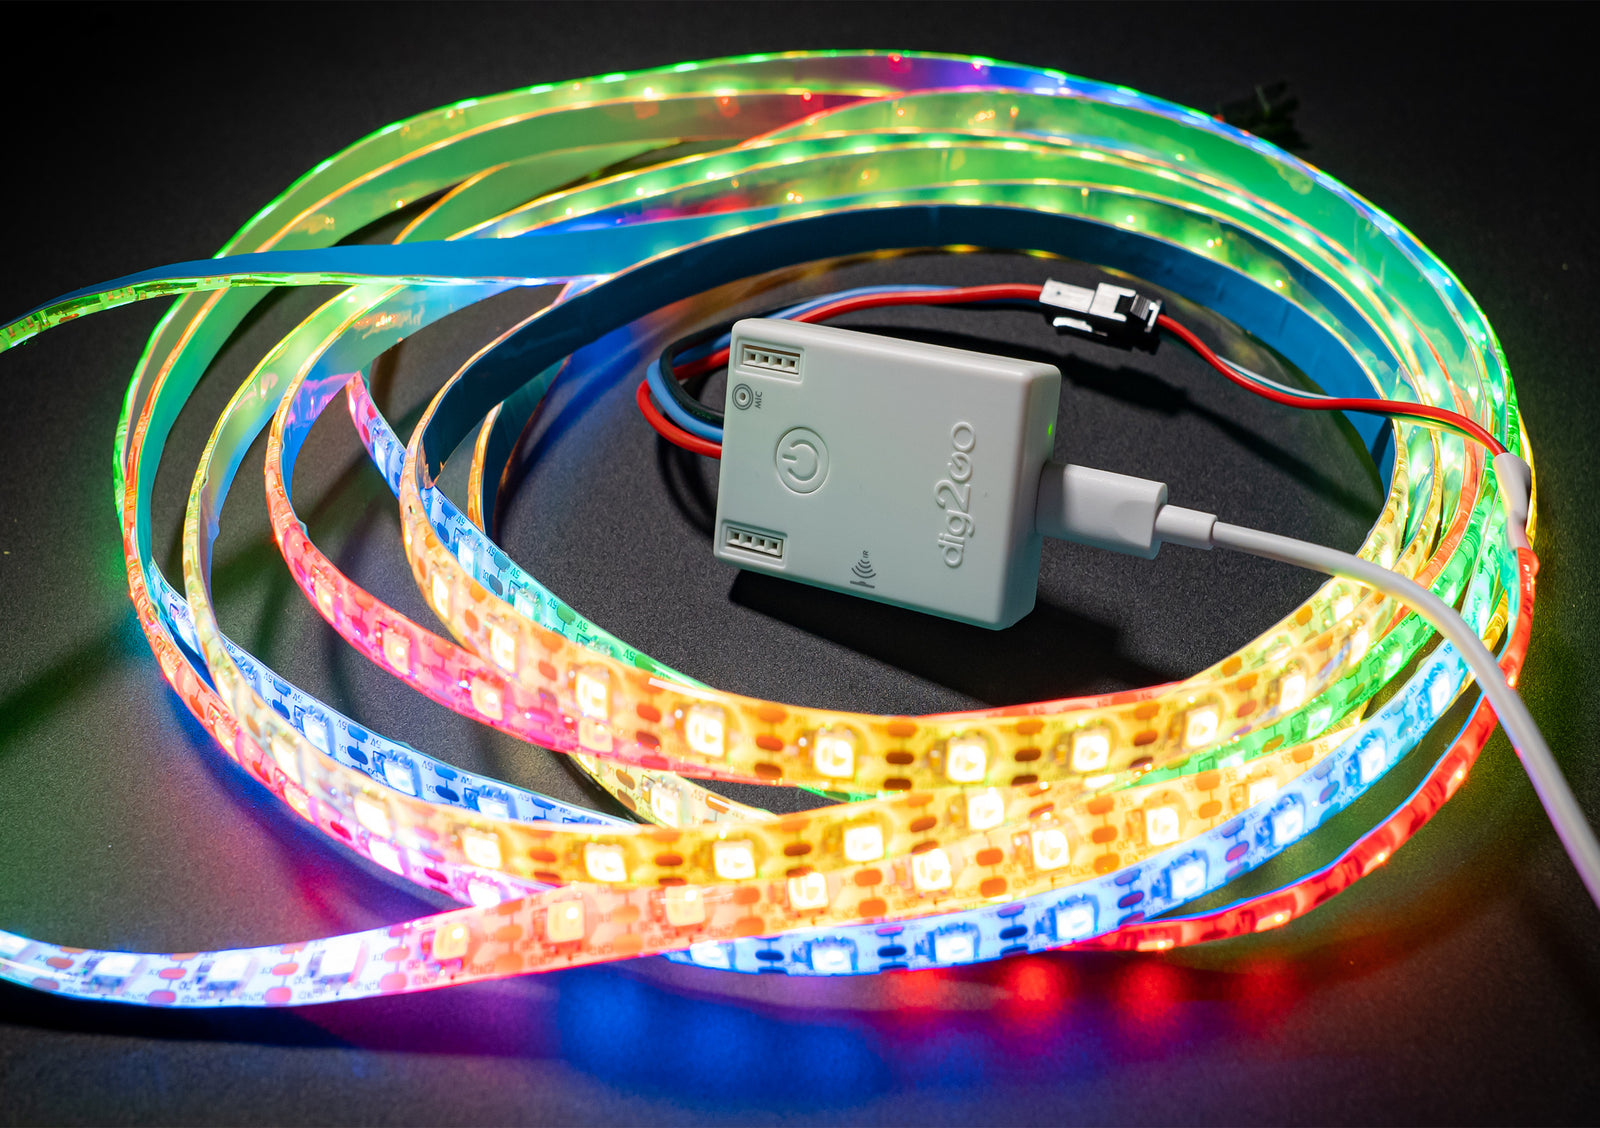 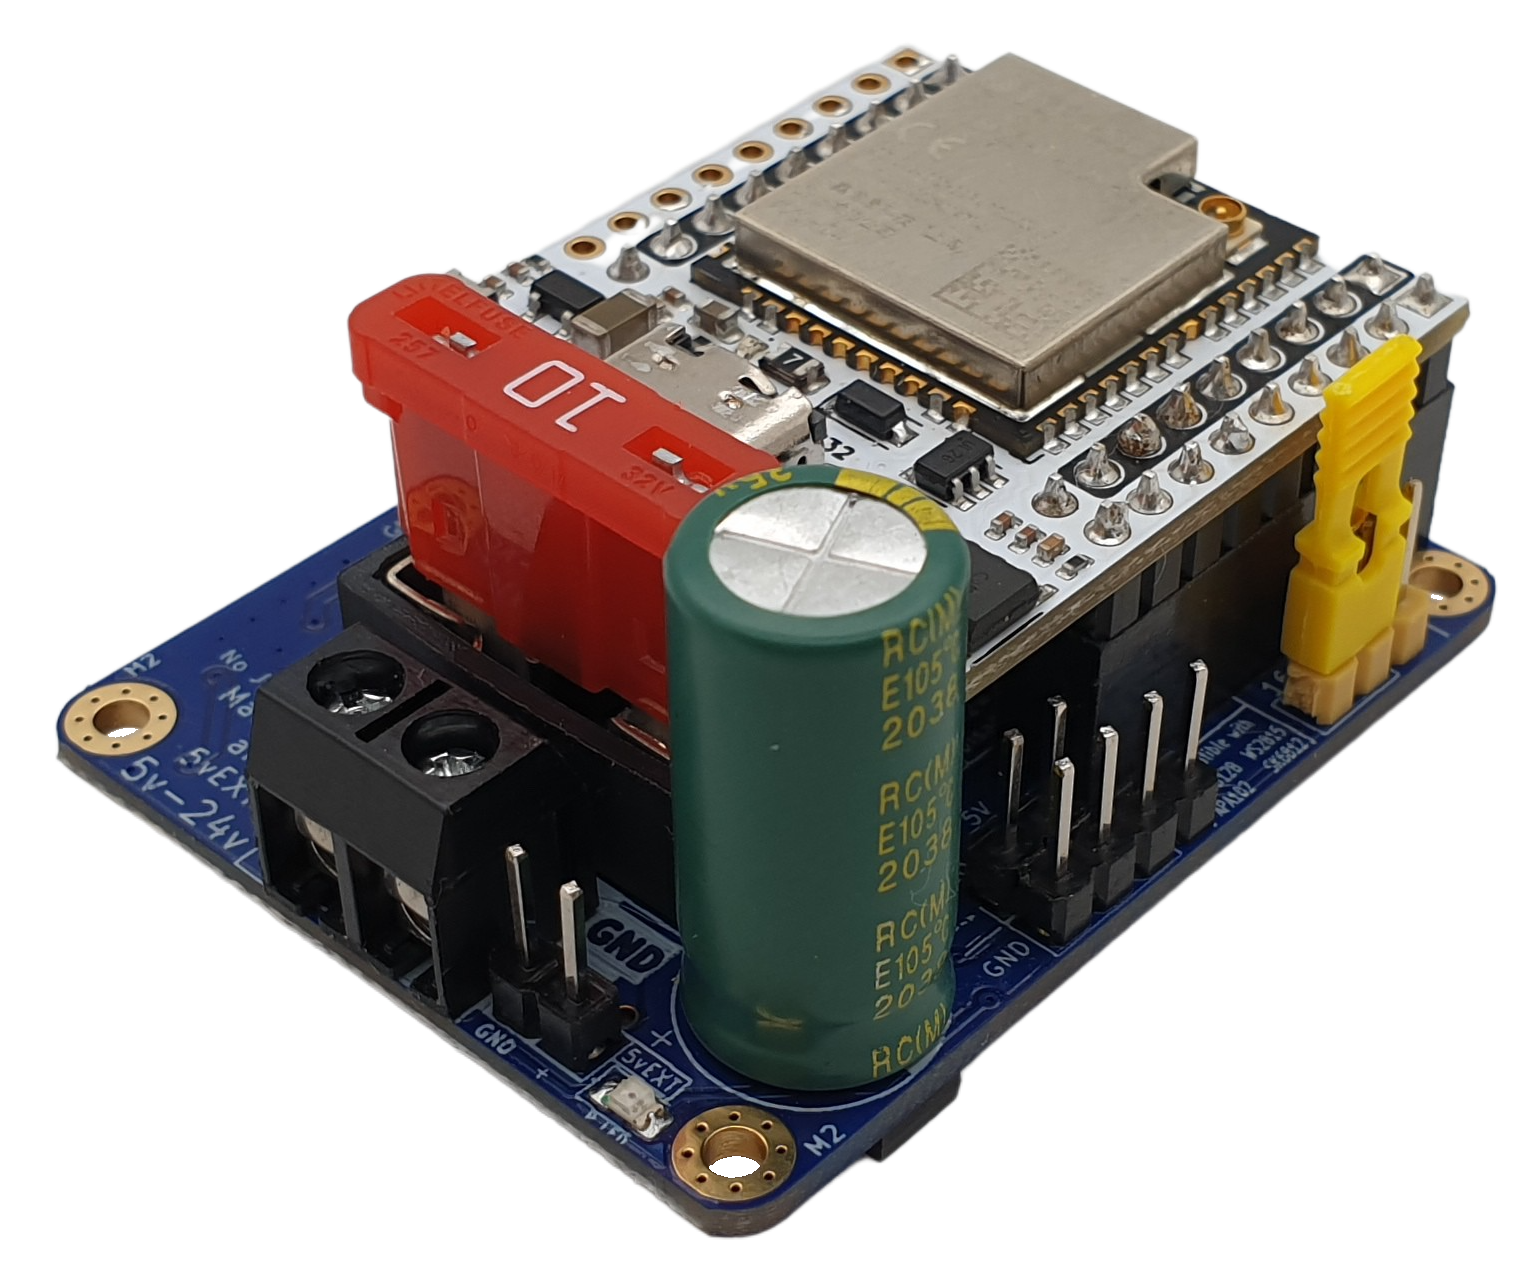  |
||
| esp32-d0-16mb |  |
Dig-Octa: Serg ESP32 and Shield /i/93057/products/2021-08-14T14%3A44%3A14.418Z-shield_v3-1.jpg?1628927139) |
||
| esp32-d0-pico2 |  |
Dig-Next-2: MHC V57 PRO:  |
||
| esp32-p4-nano | |
First Install esp32-c6-firmware-update |
Waveshare MHC ESP32-P4 shield:  |
|
| esp32-s3-n8r8v | |
SE-16p LightCrafter16  |
||
| esp32-s3-n16r8v | |
Ali* | ||
| esp32-s3-seeed_xiao |  |
Seeed store | ||
| esp32-s3-atoms3r |  |
M5Stack store | ||
| esp32-s3-zero-n4r2 |  |
Ali* | ||
| esp32-d0-wrover |  |
Ali* | ||
| esp32-p4-eth |  |
Waveshare Olimex |
||
| esp32-c3 |  |
Ali* | ||
| esp32-c3-supermini |  |
Ali* | ||
| esp32-d0-moonbase | |
Install steps in pictures:
Setup MoonLight
A new MoonLight device will appear as a WiFi Access Point (AP) in the WiFi settings of your PC, tablet, or smartphone.
The name starts with ML- followed by four characters.
Select ML-xxxx. MoonLight will open automatically in your browser (Captive portal):

Info
If MoonLight is opened in a Captive Portal, it is not possible to add Nodes, this is because WebSockets are disabled in captive browsers on some systems (e.g. MacOS). Go to http://4.3.2.1 in a normal browser to have all functionality working.
Follow the steps below.
WiFi connection
Add a WiFi connection.

Enter a hostname, add your WiFi network using the (+) button, enter the SSID and password, and press Apply Settings.
Restart the device by pressing the boot button, or simply unplug and reconnect the USB cable.
Reconnect to your home WiFi, open a browser, and go to hostname.local to access MoonLight via the new WiFi connection.
IO Board Presets
Select your board in Module IO.
If you have one of the supported premade boards (see table above), select it.
If you are unsure, leave the default settings.

Ensure the configured LED pin(s) match the physical connections on your ESP32 board.
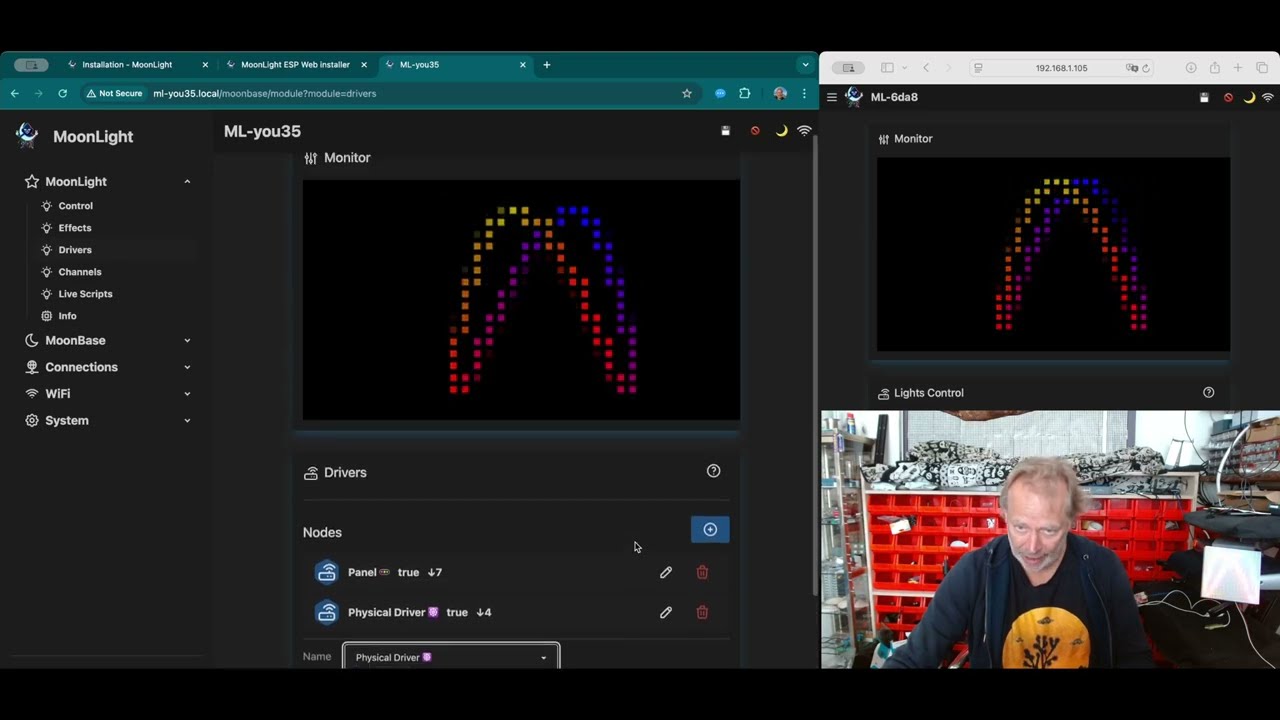
Drivers
The Drivers module contains Layouts and Drivers.
Layouts define how your LEDs are arranged.
First, add a layout by pressing (+).

For LED strips, choose Single Column.
For panels, choose Panel(s) or another suitable layout.
Layouts are indicated by 🚥. Enter the size of your LED setup.
Next, add an LED driver by pressing (+) and selecting either the Physical LED driver or FastLED driver.
Drivers are indicated by ☸️.
Effect
The Effects module contains Effects and Modifiers.
Start by adding an effect using the (+) button.
The effect should now be visible in the MoonLight monitor and on your LEDs.

Save and next steps
Press Save (💾).
This stores your configuration on the device, so your settings persist after a reboot.
If something does not work as expected, log an issue on GitHub or contact us via Discord, Reddit or YouTube.
See also Installer troubleshooting and USB-to-serial chip drivers.
Next steps
- You can now change or add effects, modifiers, layouts, and drivers
- Visit the MoonLight Overview to learn more
- Press (?) in MoonLight to jump directly to the relevant documentation page
Update MoonLight
MoonLight releases new versions regularly.
As this is a new and growing platform, it is recommended to update as soon as new releases are published.
Updates can be installed using the installer above (without erasing), or via one of the methods below.
System update
The preferred way to update MoonLight is directly within MoonLight via System update. MoonLight will notify you when new versions are available.
This method is currently not supported on smaller devices such as the ESP32-D0 and ESP32-C3.
Use the MoonLight Installer instead for these devices.
ESPConnect
Use ESPConnect to install unreleased firmware (for example, versions shared via Discord or GitHub issues).
Published releases can also be installed this way.
Launch ESPConnect.
Click Connect and select your device.
Choose Flash Tools, go to Flash Firmware, open a firmware.bin file from your file system, select Flash Offset App0, and click Flash.
Visual Studio Code
For developers: upload firmware directly from VS Code.
See Develop / Installation.
*: This page contains affiliate links