Installation
MoonLight Installer
Install Moonlight onto an ESP32 microcontroller using the MoonLight Installer
Step 1: Get an ESP32 and a WS2812 LED-strip or LED-panel. See Hardware.
Step 2: Connect the ESP32 via USB, use an USB cable which supports data transfer
Bootloader mode
Some boards: Place the board in bootloader mode by press and holding the Boot button on the ESP32, press the Reset button on the ESP32 and then release the Boot button.
Step 3: Go to the MoonLight Installer. Select your ESP32-device, or if not listed, press others.
Browser support
The installer works on Google Chrome or Microsoft Edge or similar browsers, not on Safari.
ESP32-P4-Nano
On each esp32-p4-nano board, install C6 firmware update first, choose Via ESP32-P4 USB/UART port ("OTA update"), then press connect for MoonLight install.
Step 4: Connect to the ESP32-device
Step 5: Select Install MoonLight
Step 6: Optionally erase the ESP32-device
Erase
Erase if you have a new ESP32-device or want to start fresh. Do not erase if you want to update an existing MoonLight installation. Erase deletes all settings and requires to re-connect to MoonLight.
Step 7: Confirm and install
Keep this page visible until installation complete.
Step 8: Optionally Press Logs and Console
Logging
You can see the serial logging of the ESP32-device. In case you see nothing you can press reset device, now you should see the logging.
Connect MoonLight
Step 1: Make a WiFi connection to the ESP32-device, it should present itself in the list of WiFi access points of your computer, phone or tablet.
Reset
Some boards need a reset to show up. Press the reset button on the ESP32 or press Reset in Step 8 above
Step 2: After connecting, MoonLight will show up in a web browser (all browsers supported). You will see this screen, select WiFi Station.
- The device will show in 'Captive portal' mode. Alternatively you can close the captive portal and show it in a browser using http://4.3.2.1
UI not showing when installing new version of MoonLight
If you ran previous versions of MoonLight, the UI might not show up if it has been changed since then. In this case it is needed to reload the UI from the ESP32-device (use http://4.3.2.1)
- Chrome: Command Shift R (Mac) or Ctrl Shift R or Control Reload (Windows)
- Safari: Reload from Origin : Option Shift R
-
After this not all UI elements might be immediately visible. If you see 'MoonLight loading ...' in the browser, just wait a bit (☕️)
-
Sometimes it migh be needed to clear the browser cache:
- Chrome: Delete Browsing data / delete data (caching data)
-
Safari: Empty cache: Menu Develop (enable if not visible in the Safari Menu) / empty caches (Command Option E)
Step 3: Enter your local WiFi network credentials and hostname:
Hostname
The hostname will be used to access your device. E.g. if the hostname is ML-home you can access it using http://ml-home.local
Track analytics
MoonLight sends anonymous usage data to Google Analytics when it is restarted. This data consists of country, firmware, board, and version. You can opt-out at any time by unchecking this option. See also WiFi Station
Step 4: Press Add Network and apply settings. After connecting to your normal WiFi network you will see this screen showing the new IP address of your MoonLight ESP32-device.
Step 5: When connected to your local WiFi network, enter the IP address of the new device. Alternatively enter the hostname.
Using hostname
- Restart the device to make the hostname known to your network (go to system status, scroll down and press restart)
- Enter the hostname in your browser e.g. http://ml-home.local
- ESP32-P4-Nano: November 16, 2025: hostname is not working correctly, use IP address instead
reload UI
See step 2 ⚠️ if UI is not showing up, use http://ml-home.local (replace ml-home with the hostname) or the IP address.
Setup MoonLight
Step 1: Add an effect
Step 2: Add a layout and set pin(s)
- Add a layout Node by pressing the blue + button and select on off the 🚥 options (Panel 🚥 is a safe bet to start with). Scroll down to the Pin Control field and enter the pin number(s) you connected the strip or panel to, make sure the pin exists, otherwise the device can crash and will restart in save mode. Correct the pin(s) in the Layout node and restart.
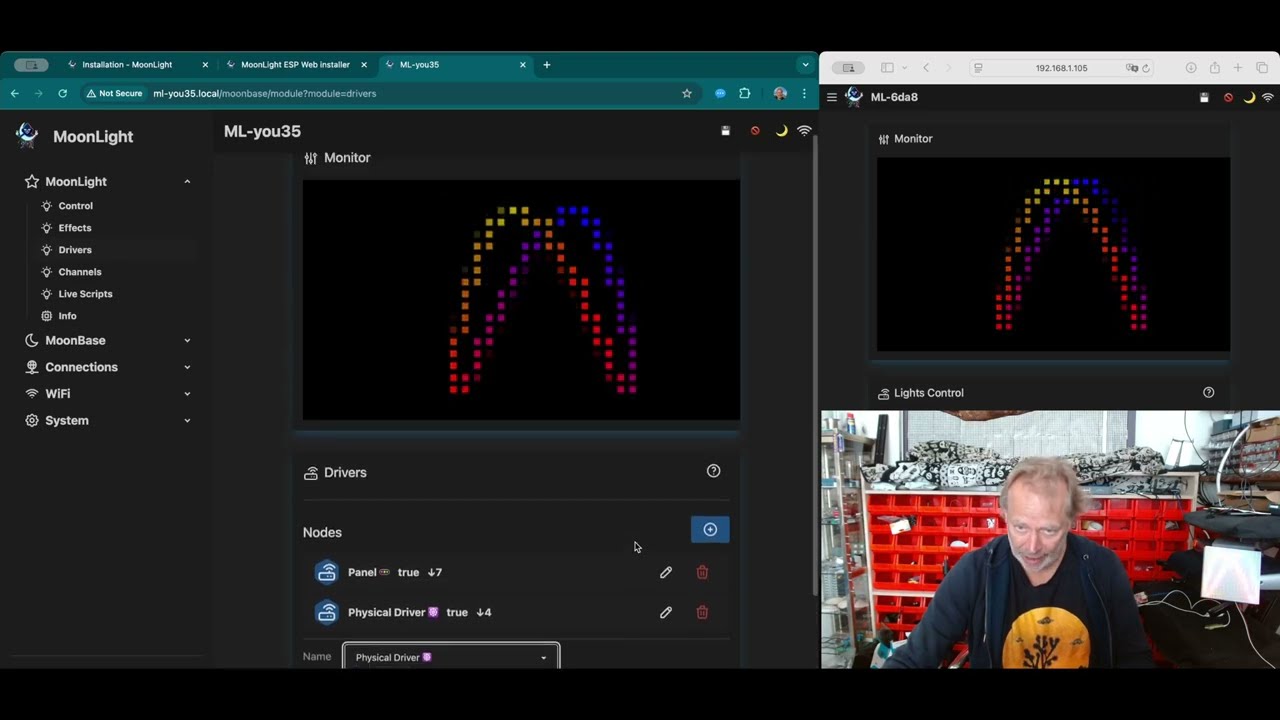
Monitor
The Monitor should now show the effect
Step 3: Add a driver
- Add a driver node by pressing the blue + button and select one of the ☸️ options.
Strip or panel
The LEDs on your strip or panel should now show the effect
Choose driver
FastLED driver is best to start with if you have a normal (ws2812) LED strip or panel.
Choose the Parallel LED Driver if you have more then 4 LED strips or panels or non standard LEDS (e.g. RGBW lights, curtains...). Other drivers (Virtual, Hub,) not supported yet.
In some cases restart the device to make layout changes effective is needed.
For ESP32-P4-Nano, choose Parallel LED Driver, using the Parallel IO driver by @Troyhacks. Easy quick start: choose Pin 37 and connect a LED strip or panel as follows (Note: the pins on the board the jst connector is plugged in are in order +, Ground, Data !!! - Ignore the wire colors!):

Step 4: Press save (💾). Saves your setup to the file system, so if a device is restarted, your settings are still there.
Next steps
- You can now change effect or add effects, modifiers, layouts and drivers
- Go to MoonLigh Overview
- press the ? in MoonLight to go directly to the relevant page
Update MoonLight
-
The preferred way to update MoonLight is via System update
- Download from GitHub
- Upload from file. From a GitHub release, or created by VSCode, see Develop / Installation
-
To install the latest release, you can also use the MoonLight Installer (no need to erase the device if updating)
- Upload directly from VSCode, see Develop / Installation